Difference between revisions of "Zoiper"
From VoiceMailTel Wiki
| Line 1: | Line 1: | ||
| − | + | [[File:Zoiper.png]] | |
| − | + | '''1. Download and install the soft phone''' | |
| − | + | Click http://www.zoiper.com/softphone/ and select the version you want (free or biz). | |
| + | |||
| + | '''2. Configure the phone''' | ||
| + | |||
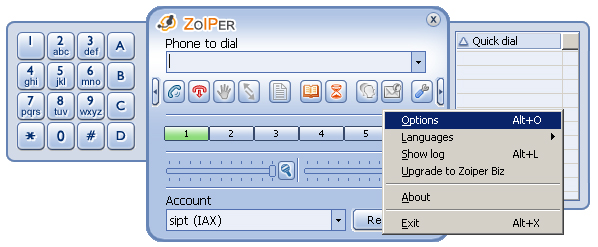
| + | Right click on the screen of virtual phone and select “'''Options'''”. | ||
| + | [[File:Zoiper-config-step1.jpg]] | ||
| + | |||
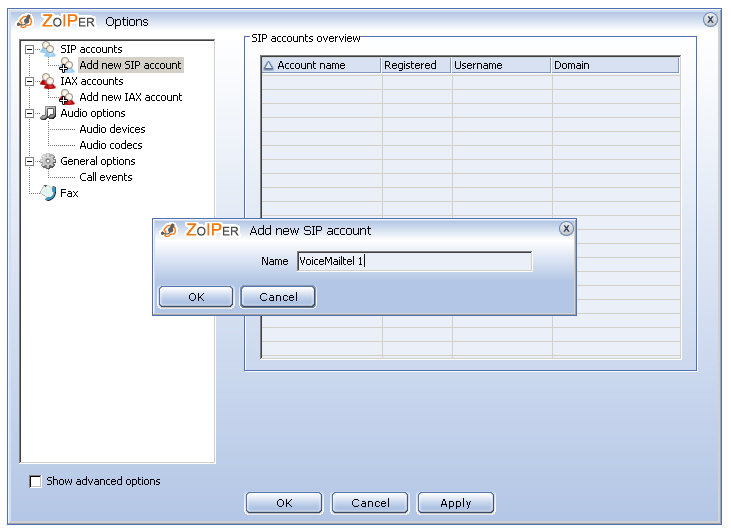
| + | In the menu on the left select SIP accounts -> Add a new SIP account | ||
| + | Enter a name for the account you want to create. | ||
| + | [[File:Zoiper-config-step2.jpg]] | ||
| + | |||
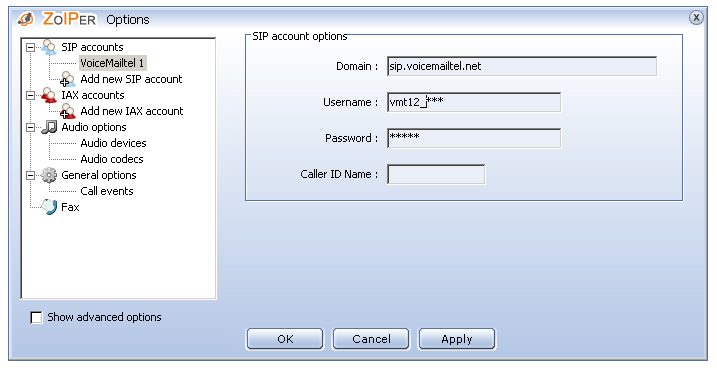
| + | After you've created a new SIP account, type the details for the terminal you want to setup: | ||
| + | Domain: '''sip.voicemailtel.net''' | ||
| + | Username: '''provided by Voicemailtel''' | ||
| + | Password: '''provided by Voicemailtel''' | ||
| + | Caller ID Name: '''your name''' | ||
| + | |||
| + | [[File:Zoiper-config-step3.jpg]] | ||
| + | |||
| + | 3. Click "'''OK'''" and to save settings. | ||
Revision as of 13:56, 26 July 2010
1. Download and install the soft phone
Click http://www.zoiper.com/softphone/ and select the version you want (free or biz).
2. Configure the phone
Right click on the screen of virtual phone and select “Options”.
In the menu on the left select SIP accounts -> Add a new SIP account
Enter a name for the account you want to create.
After you've created a new SIP account, type the details for the terminal you want to setup:
Domain: sip.voicemailtel.net
Username: provided by Voicemailtel
Password: provided by Voicemailtel
Caller ID Name: your name
3. Click "OK" and to save settings.


